Your vehicle’s exhaust system is a component that may fail from time to time; therefore, it is essential to know how to remove exhaust hangers. The exhaust system is nearest to the road and found underneath your car’s engine. As a result, when you go over that annoying curb, it is likely to be damaged. However, there is no need to panic as this is common. The “exhaust hanger” is a part of the exhaust system, which can be easily replaced. Let us go through how to remove exhaust hangers.
What is an Exhaust Hanger?
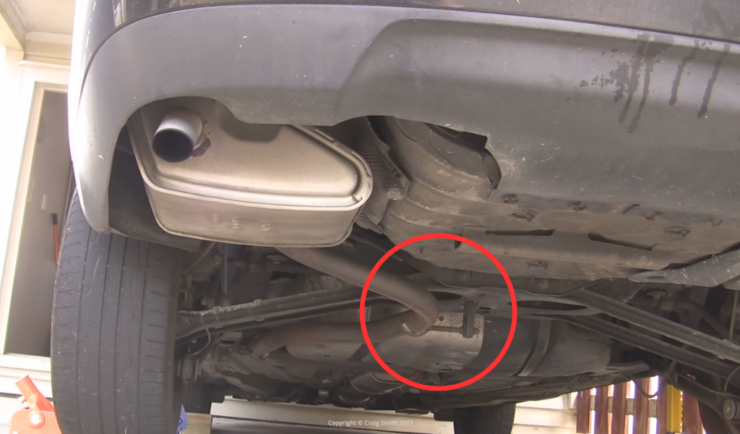
The attachments that hold and secure the exhaust pipes underneath the car are exhaust system hangers or exhaust supports. The exhaust hangers are often composed of rubber to withstand engine vibrations and to permit the exhaust to bend as the vehicle drives. In addition, they are essential for securely fastening the exhaust and reducing cabin noise and vibration.
Reasons Why You Need to Remove Exhaust Hangers
1. Exhaust Hangs Low
An exhaust that hangs lower than usual is one of the first signs of an exhaust hanger problem. Rubber exhaust system hangers tend to dry out and break over time. If an exhaust hanger fails, the car’s exhaust pipes may hang low and visible beneath the vehicle due to a lack of support.
2. Exhaust is Loud
A thunderous exhaust is yet another sign of a probable issue. An exhaust leak can occur if any of the exhaust pipes rupture due to a lack of support. In addition, a hissing noise may be heard from beneath the car, which is particularly noticeable when the brake is applied.
3. Decreased Power, Acceleration, and Fuel Consumption
Engine power difficulties are another sign of a prospective malfunction. If either of the exhaust hangers falters, they might put extra strain on the vehicle’s exhaust pipes, causing them to shatter. Defective exhaust pipes may cause an exhaust leak, which will produce a loss in power, acceleration, and fuel consumption.
Exhaust Hanger Removal Tool Description
Exhaust hangers are removed using a particular pair of pliers. The rubber supports are separated from the exhaust hanger brackets with these pliers. The tool works on all foreign and domestic automobile exhaust systems. If you do not have these pliers, though, that is fine. Exhaust hangers may be removed in a variety of methods.

3 Easy Ways of How to Remove Exhaust Hangers
1. How to Remove Exhaust Hangers with A Screwdriver
Materials needed:
- Exhaust Hanger(s)
- Car Jack and Jack Stands
- Mechanic’s Creeper
- Screwdriver
- Safety Glasses
- Wire Cutters
- Lubricant (Optional)
- Owner’s manual
Step 1: Secure Your Automobile by Jacking It Up
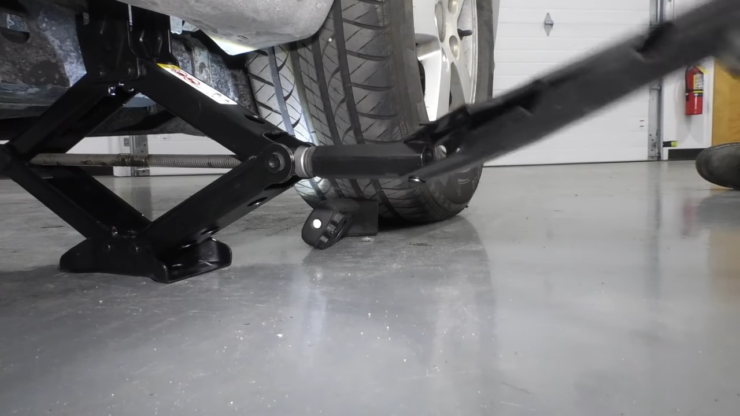
Working beneath a car might be the riskiest thing a home mechanic can do. To support the automobile, be sure to use excellent quality jack stands and support it from the factory-recommended jack locations. The optimal jack point positions should be listed in your car’s owner’s manual.
Step 2: Look for The Broken Hanger
Because some hangers may be slightly ripped or severely damaged, be extra cautious when inspecting them, as yanking on them too hard may cause them to tear altogether, allowing the exhaust to fall out. It may be helpful to spend a little extra time replacing all the exhaust hangers.
Step 3: Remove the Hanger
Put on your safety glasses and use your wire cutters to snip the hangers off. The hangers generally include a steel cable embedded in the rubber, making them harder than they appear. You can use some lubricant to take the hangers off if you are having trouble.
Step 4: Assemble the New Hanger
The hanger should be stretched over the bracket with the help of your screwdriver. Before installing a hanger that must be pressed onto a pin, it may be beneficial to lubricate the hanger.
Step 5: Test the New Hanger
After securing the automobile on the floor, shake the exhaust pipe vigorously. Due to the improved hangers, it should move without clashing with anything below the vehicle. Next, check that everything is in functioning condition by driving over a few speed bumps.

2. How to Remove Exhaust Hangers Using Needle Nose Pliers or Exhaust Hanger Removal Pliers
Materials needed:
- Exhaust Hanger(s)
- Car Jack and Jack Stands
- Mechanic’s Creeper
- Needle Nose Pliers or Exhaust Hanger Removal Pliers
- Safety Glasses
- Wire Cutters
- Lubricant (Optional)
- Owner’s manual
Step 1: Secure Your Automobile by Placing It On The Car Jack Supports
Working beneath a car might be the riskiest thing a home mechanic can do. To support the automobile, be sure to use excellent quality jack stands and support it from the factory-recommended jack locations. The optimal jack point positions should be listed in your car’s owner’s manual.
Step 2: Look Beneath Your Automobile for The Broken Hanger
Because some hangers may be slightly ripped or severely damaged, be extra cautious when inspecting them, as yanking on them too hard may cause them to tear altogether, allowing the exhaust to fall out. It may be helpful to spend a little extra time replacing all the exhaust hangers.
Step 3: Remove the Hanger
Put on your safety glasses and use your wire cutters to snip the hangers off. The hangers generally include a steel cable embedded in the rubber, making them harder than they appear. You can use some lubricant to assist take the hangers off if you are having trouble pulling them off.
Step 4: Assemble the New Hanger
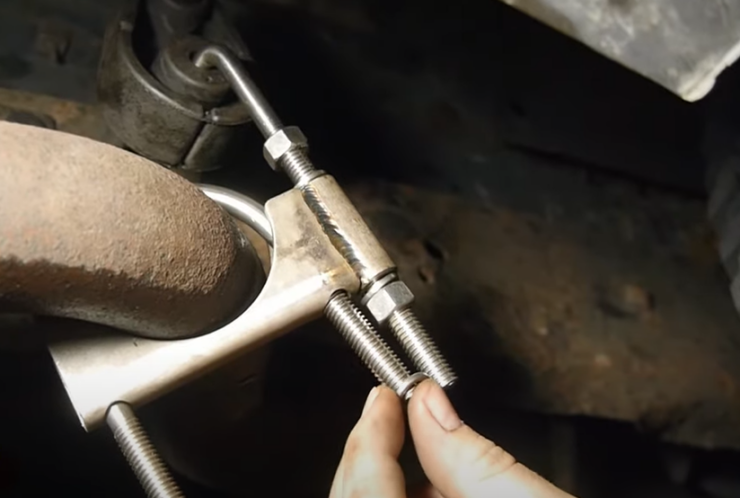
It is now time for the pliers to shine. It is the simplest technique to get rid of exhaust hangers. Take the plier and gently grasp the hanger. The hanger will shrink, making clearance for the exhaust pipe to exit.
Step 5: Test the New Hanger.
If everything appears to be in order, place the vehicle on the ground and drive over a few speed bumps to ensure that everything is in working order.

3. How to Remove Exhaust Hangers Without Using a Tool
Materials needed:
- You do not need any special tools at all for this
Step 1: Loosen the Hanger
Using your hand, loosen the hanger as much as possible. It will alleviate the hanger’s tension at first, allowing you to go on to the next phase in the removal process.
Step 2: Jack Up Your Car
To keep the exhaust line in place, use a stand. It is not always required to do so. However, if you want your job to be perfect, you may use this approach.
Step 3: Soak A Hanger in Soapy Water.
The water within the hanger will cause it to become slick and simple to remove. Therefore, it should be sprayed from both the front and the rear. The hanger is thus lubricated.
Step 4: Remove the Hanger
Using your hand, carefully remove the hanger and pull the pipe out.
Step 5: Hand-Install the Hanger
Hanger holes should be inserted into the exhaust and vehicle mounting locations.
Some Dos and Don’ts for Successfully Removing Your Exhaust Hanger
Do’s
- For further work, unplug the car’s battery. It will lighten the stress on the entire exhaust system.
- Disconnect all the vehicle’s oxygen sensors. Under any circumstances, your safety takes first. Therefore, it would be best if you worked in a safe setting with no potential for risk.
- Always use lubrication.
Don’ts
- Do not just yank out the exhaust hanger. There will be a slew of issues because of this.
- If your automobile is running, do not get beneath it.
Frequently Asked Questions
What is the Purpose of an Exhaust Hanger?
The purpose of an exhaust hanger is to provide support and stability to the exhaust system in a vehicle. The exhaust system includes pipes, mufflers, and other components that are responsible for removing exhaust gases from the engine and expelling them out of the tailpipe.
Exhaust hangers are typically made of rubber or metal and are designed to keep the exhaust system securely in place. They are attached to the vehicle’s frame and are used to hold the exhaust pipes in the correct position.
Without exhaust hangers, the weight of the exhaust system would cause it to hang down and potentially drag on the ground. This can cause damage to the exhaust system and other components of the vehicle.
Exhaust hangers also help to reduce noise and vibration by keeping the exhaust system in place and preventing it from rattling against the vehicle’s frame or other components.
In summary, the purpose of an exhaust hanger is to provide support and stability to the exhaust system, prevent damage to the system and other components of the vehicle, and reduce noise and vibration.
Do Exhaust Hangers Go Bad?
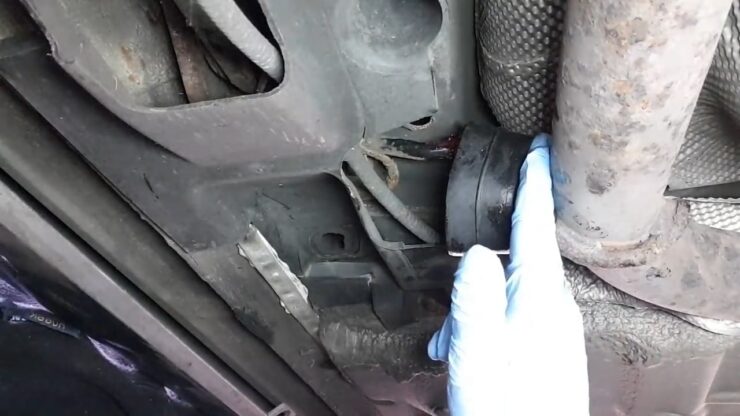
Exhaust hangers are an essential component of the exhaust system in a vehicle. They are designed to hold the exhaust system in place and prevent it from bouncing around while driving. Over time, these hangers can wear out, and when they do, they may need to be replaced. So, the question is, do exhaust hangers go bad?
The answer is yes, exhaust hangers can go bad. They are usually made of rubber or metal and are subject to wear and tear due to exposure to the elements, road debris, and constant vibration. Over time, the rubber hangers can become brittle and crack, while the metal hangers can rust and corrode. When this happens, the exhaust system can become loose and start to bounce around, causing damage to other parts of the vehicle and making loud rattling noises.
It is important to have the exhaust hangers inspected regularly, especially if you notice any unusual noises or if the exhaust system appears to be hanging lower than usual. A mechanic can easily check the condition of the hangers and replace them if necessary. In addition to preventing damage to other parts of the vehicle, replacing worn-out hangers can also improve the performance of the exhaust system by reducing vibrations and improving the flow of exhaust gases.
Can You Drive with Exhaust Hanging Off?
Driving with an exhaust hanging off is not recommended as it can be dangerous and cause damage to the vehicle. The exhaust system is responsible for removing harmful gases from the engine, and if it is damaged or not properly attached, it can affect the performance of the vehicle and even cause a fire.
Additionally, driving with an exhaust hanging off can cause the exhaust to drag on the ground, which can cause sparks and start a fire. It is important to have the exhaust system checked by a professional mechanic and repaired as soon as possible if it is damaged or hanging off.
How Much Does It Cost to Fix a Hanging Exhaust Pipe?
The cost of fixing a hanging exhaust pipe can vary depending on the severity of the damage and the specific vehicle. In general, the cost can range from around $50 to $500 or more.
If the issue is simply a loose or damaged exhaust hanger, it may be a quick and easy fix that can be done at a relatively low cost. A replacement hanger may cost anywhere from $10 to $50, depending on the make and model of the vehicle.
However, if the exhaust pipe itself is damaged or corroded, the repair costs can be much higher. In some cases, the entire exhaust system may need to be replaced, which can cost upwards of $1,000 or more.
It’s important to have any issues with a hanging exhaust pipe addressed promptly, as driving with a damaged exhaust system can lead to additional problems and even pose a safety hazard.
Is Exhaust Vibration Normal?
A variety of factors can cause vibrations in a car, but one of the most prevalent is an exhaust leak. When you are driving, you will notice a little continuous vibration that becomes stronger as you accelerate. For example, the steering wheel or the gas pedal will often vibrate because of a tiny exhaust leak.
Conclusion
You can avoid having to deal with various exhaust issues. Regardless of whether you have detected a problem, get your exhaust system examined every year. However, if your exhaust hanger needs to be replaced, remove it using one of the techniques listed above and get started on your project today!
Related Posts:
- How Much Oil Does A 6.7 Cummins Take - Capacity,…
- Tips and Tricks for a Successful Used Toyota…
- Subaru Key Fob Battery Replacement – 3 Simple &…
- How to Compress Caliper Piston – 6 Best Ways to Do It Right
- How to Compress Brake Caliper in 2024 - 4 Foolproof Ways
- Subaru Forester CV Joint Replacement Cost - A…

