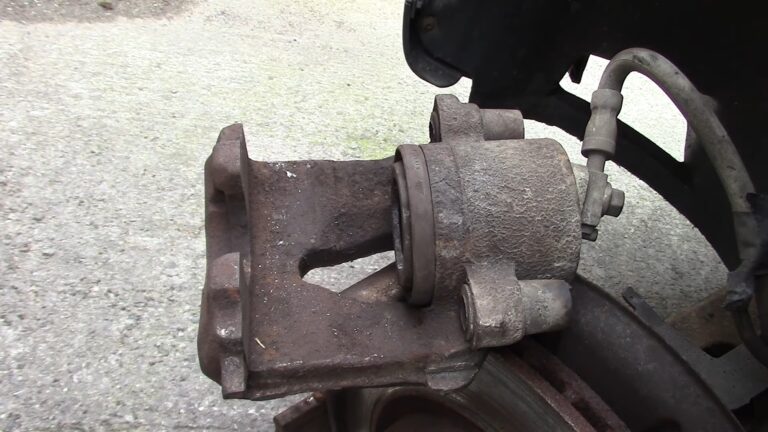
The caliper piston is a crucial component of a car’s braking system. If it doesn’t compress properly, it can lead to significant braking issues. Ensuring that the caliper piston is functioning correctly is vital for the safety and performance of your vehicle.
Always remember to wear appropriate safety gear when working on your car’s braking system. Ensure the vehicle is securely lifted if needed, and always double-check your work to prevent any mishaps.
Pro Tip: Regularly inspecting your brake system can help identify potential problems before they become severe.
Tools and Materials
List of Necessary Tools
- C-Clamp
- Channel Locks
- Piston Compression Tool
- Screwdriver
Recommended Safety Gear
- Gloves
- Safety glasses
- Mechanic’s apron or coveralls
Fun Fact: Did you know that brake fluid is hygroscopic, meaning it absorbs moisture from the air? This is why it’s crucial to keep brake fluid containers tightly sealed.
Method 1: Using a C-Clamp
- Place the C-clamp over the caliper, ensuring it reaches the end of the piston.
- Adjust the screw on top to ensure it’s positioned correctly.
- Use a piece of wood to shield the piston’s surface from potential damage.
- Turn the screw to increase the pressure. As the pressure increases, the piston should start to compress.
- Continue tightening until the piston is fully compressed.
- Once done, carefully remove the C-clamp from the caliper.
Tips for Effective Compression
Ensure that the C-clamp is positioned correctly to avoid damaging the caliper or the piston. Using a piece of wood can help distribute the pressure evenly and prevent any scratches or dents on the piston.
Method 2: Using a Caliper Piston Tool
- Ensure you have the correct adapters for the job. An incorrect fit can damage the piston.
- Place the compressor tool around the caliper.
- Tighten the compressor until the piston starts retracting back into the caliper.
- Continue this process until the piston is fully compressed.
Advantages of Using a Caliper Piston Tool
Using a specialized piston compression tool can make the job much easier and safer. These tools are designed specifically for this purpose, ensuring a smooth and effective compression process. They also reduce the risk of damaging the piston or caliper, ensuring longevity and optimal performance.
Interesting Fact: Some modern cars come with electronic parking brakes on the rear wheels. These often require a compatible code scanner to retract the caliper pistons.
Method 3: Using Needle-Nose Pliers
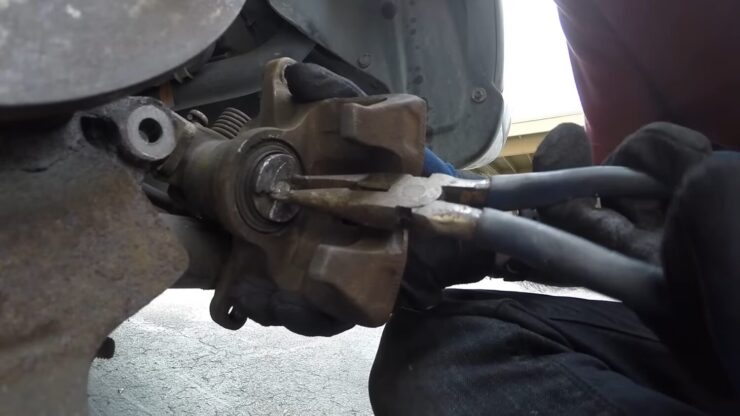
While not the most conventional method, in a pinch, you can use needle-nose pliers to compress the caliper piston. However, this method requires caution to avoid damaging the piston or caliper.
- Ensure the vehicle is safely lifted and secured on jack stands.
- Remove the wheel to access the brake caliper.
- Carefully position the needle-nose pliers on the piston, ensuring a firm grip.
- Gently twist and press the piston to compress it. Ensure even pressure to avoid misalignment.
- Once compressed, proceed with your brake maintenance or replacement.
When Needle-Nose Pliers Are Appropriate
This method is best suited for emergency situations or when you don’t have access to the recommended tools. It’s essential to be gentle and cautious to prevent any damage.
Method 4: The Rubber Grommet Technique
This method is more of a makeshift approach and is not commonly used. However, it can be effective when done correctly.
- Place a rubber grommet around the piston’s edge.
- Using a C-clamp or similar tool, apply pressure to the grommet, which in turn compresses the piston.
- Ensure even pressure to avoid misalignment or damage.
- Once the piston is compressed, remove the grommet and proceed with your brake task.
Safety Considerations
Always ensure that the rubber grommet is in good condition and can withstand the pressure. This method is a temporary solution and should be used with caution.
Method 5: Using a Wood Block
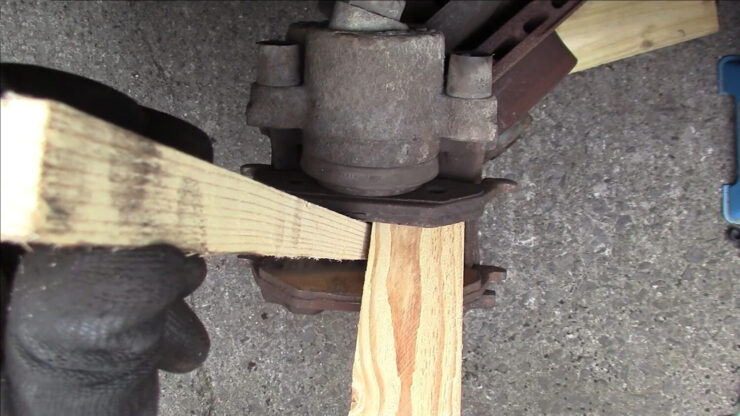
- Cut a wood block to fit between the caliper and the piston.
- Place the wood block against the piston.
- Using a C-clamp or similar tool, apply pressure to the wood block, compressing the piston.
- Ensure even pressure and monitor the wood block for any signs of cracking or breaking.
- Once compressed, remove the wood block and proceed.
- Provides an even surface for compression.
- Reduces the risk of damaging the piston.
- Not as effective as specialized tools.
- There’s a risk of the wood block breaking if it’s not sturdy enough.
Did You Know? Brake pistons in calipers ensure that the pads contact the discs to slow down the vehicle. When you apply pressure to the brake pedal, fluid travels from the master cylinder to the brake calipers, forcing the pistons to push the pads into the discs.
Method 6: Hydraulic Piston Compression
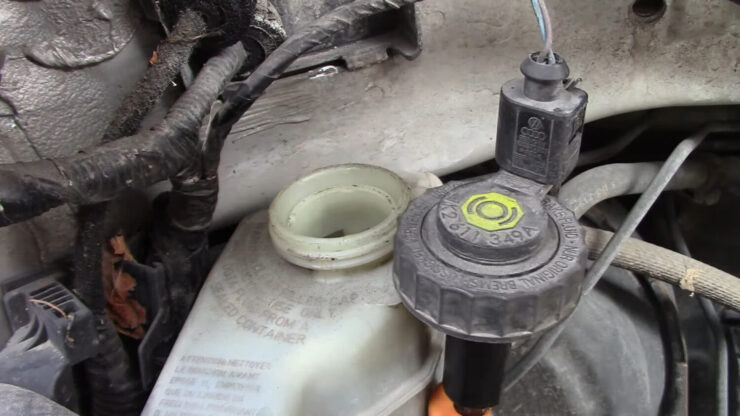
- Ensure the brake fluid reservoir cap is open to allow for fluid displacement.
- Connect a hydraulic compressor tool to the caliper.
- Slowly apply pressure, ensuring the piston compresses evenly.
- Monitor the brake fluid reservoir to ensure it doesn’t overflow.
- Once compressed, disconnect the hydraulic tool and proceed with your brake task.
Equipment Needed
- Hydraulic compressor tool
- Brake fluid catch container (to prevent any spills)
Interesting Fact: Brake caliper pistons can be made from various materials, including plastic (phenolic), steel, and aluminum. Each material has its advantages and disadvantages in terms of heat conduction and corrosion resistance.
FAQ
Why is it essential to compress the brake caliper when replacing brake pads or rotors?
The brake caliper is responsible for applying pressure to the brake pads, which in turn press against the rotor to slow down or stop your vehicle. Over time, brake pads wear down, and you’ll need to replace them to maintain optimum braking performance. When installing new brake pads, it’s crucial to compress the brake caliper, which allows for proper alignment and fitment of the new pads.
What risks are associated with not compressing the caliper properly?
Failing to compress your brake caliper properly can lead to several issues, including reduced braking efficiency, uneven wear on brake components, and, in extreme cases, brake system failure. Without proper compression, your brake pads may not make full contact with the rotor, resulting in reduced stopping power and longer stopping distances.
Improperly compressed calipers can also cause uneven wear on your brake pads and rotors, leading to more frequent replacements and increased maintenance costs.
How do I know if I’ve compressed the brake caliper correctly?
After compressing the brake caliper and installing the new brake pads, you should be able to slide the caliper back onto the rotor smoothly and securely. Additionally, once the brake system is reassembled, pump the brakes a few times to ensure proper brake pressure. If the brake pedal feels soft or spongy, or if you notice any unusual noises or vibrations when braking, it may indicate that the caliper was not compressed correctly or that there are other issues with the brake system.
Conclusion
Compressing a brake caliper is an integral step in maintaining the safety and efficiency of a vehicle’s braking system. Whether you’re a seasoned mechanic or a car owner looking to understand more about your vehicle’s operations, knowing how to properly compress a brake caliper is essential.
With the right tools and techniques, you can ensure optimal braking performance, prolong the lifespan of your brake components, and drive with confidence. Always prioritize safety, use the appropriate tools, and stay informed to tackle this task effectively.