Fellow car enthusiasts and everyday drivers alike! If you’ve ever popped open the hood of your car, you’ve likely come across a seemingly simple tool that holds immense importance – the dipstick.
This slender piece of metal or plastic, often adorned with dots or markings, is like a health report card for your vehicle’s engine. It tells you about the lifeblood of your car: the engine oil.
In this guide, we’re going guide show you how to read a dipstick with dots. So, buckle up, and let’s embark on this journey together!
Dipstick Basics
A dipstick is a measuring tool used to check the level of fluid in your vehicle, most commonly the engine oil. There are various types of dipsticks available, each designed for a specific purpose, be it for the engine oil, transmission fluid, or brake fluid. Regular checks using a dipstick can save you from potential engine damage and costly repairs.
Pro Tip: Always keep your dipstick clean. A dirty dipstick can give inaccurate readings and might lead to engine issues.
Preparing to Read the Dipstick
Before you get started, there are a few things you need to ensure:
- Gather Necessary Tools and Materials: You’ll need a clean rag or paper towel. This is essential for wiping off the oil from the dipstick to get a clear reading.
- Ensure a Safe and Level Surface: Always check the oil level when your car is on a flat surface. This ensures that the oil is evenly distributed in the engine and gives an accurate reading.
- Allow the Engine to Cool Down: It’s crucial to let your engine cool down before checking the oil. Not only is this safer (no one wants to get burned!), but hot oil can expand and give a false reading.
Did You Know?: Checking the oil level on an incline can lead to inaccurate readings, potentially causing you to overfill or underfill your engine oil.
Identifying the Dipstick
Now, let’s get down to the actual process.
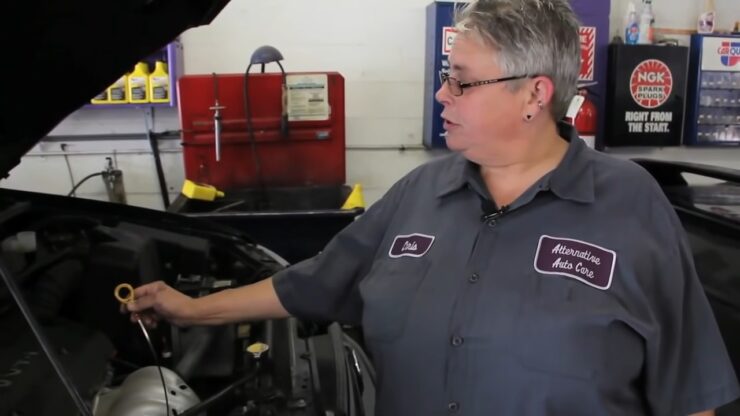
First, you’ll need to locate the dipstick in your vehicle. While the location can vary depending on the make and model of your car, it’s typically a brightly colored handle (often yellow or red) sticking out from the engine area.
It’s essential to differentiate between the various dipsticks in your vehicle, as there are separate ones for engine oil, transmission fluid, and sometimes other fluids.
Interesting Fact: The design and color of dipsticks have evolved over the years, but their primary function remains unchanged – to help vehicle owners maintain their engines in top condition!
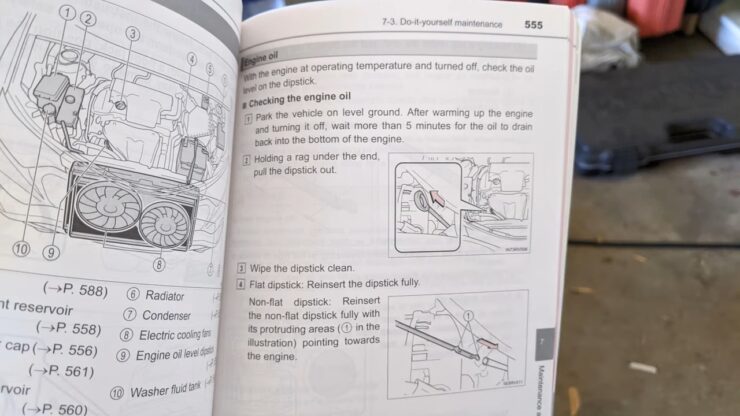
Pulling Out the Dipstick

Once you’ve located the dipstick and ensured your engine is cool, it’s time to pull it out. Here’s how:
- Open the Car’s Hood: This might seem obvious, but always ensure the engine is off before you do this.
- Find the Dipstick: As mentioned earlier, it’s typically a brightly colored handle.
- Remove the Dipstick: Gently pull it out from the engine.
- Wipe it Clean: Using your rag or paper towel, wipe any oil off from its end. This ensures you get a clear reading when you reinsert it.
Did You Know?: The design of the dipstick allows it to rest at the very bottom of the oil pan, ensuring it measures the total oil present in the engine.
The Dotted Markings
Now, let’s decode those dots. Every dipstick has a way of indicating the proper oil level. It could be two pinholes, the letters L and H (low and high), abbreviations like MIN and MAX, or simply an area of crosshatching. The dots or markings represent:
- Minimum Oil Level: This is the lowest safe level of oil. If the oil is below this mark, you need to add more.
- Maximum Oil Level: This indicates the oil reservoir is full. If the oil is above this mark, it might be overfilled, which isn’t good for the engine.
Pro Tip: Always aim to keep the oil level between these two markings for optimal engine performance.
Checking the Oil Level
After wiping the dipstick clean:
- Reinsert the Dipstick: Push it all the way back into its tube.
- Pull it Out Again: This time, look at both sides of the dipstick to see where the oil is on the end.
- Analyze the Level: If the top of the oil streak is between the two marks or within the crosshatched area, you’re good to go. If not, you might need to add or remove some oil.
Interesting Fact: Engine oil not only lubricates the engine’s internal moving parts but also helps keep the engine clean, prevents dirt buildup, and aids in cooling the engine.

Interpreting the Readings
Reading the oil level against the dots is crucial:
- Oil at or Above the Maximum Mark: This could mean the engine is overfilled, which can damage the engine.
- Oil Below the Minimum Mark: Your engine is running low on oil and needs a top-up.
- Oil’s Color: It should appear brown or black. A light, milky appearance might indicate coolant leakage into the engine. If you spot metal particles, it could hint at internal engine damage.
Pro Tip: If you suspect any issues like coolant leakage or internal damage, it’s best to consult a mechanic immediately.
Topping Up or Draining Oil
Once you’ve determined the oil level using the dipstick, you might find that you need to adjust the amount of oil in your engine. Here’s how:
- Adding Oil: If the oil level is below the minimum mark, you’ll need to top up. First, locate the oil filler cap on top of the engine. Using a funnel can help prevent spills. Add oil gradually, checking the level with the dipstick to ensure you don’t overfill.
- Draining Excess Oil: Overfilling can be harmful to the engine. If you’ve added too much, you’ll need to drain some. This is a bit more complex and might require you to go underneath the car or visit a mechanic.
- Choosing the Right Oil: Always use the grade of oil recommended in your car’s owner’s manual. Common designations include 0W-20 or 5W-30. The right oil ensures optimal engine performance and longevity.
Did You Know?: Using the wrong type or grade of oil can reduce fuel efficiency and even cause engine damage over time.
When to Seek Professional Help
While checking the oil using a dipstick is straightforward, sometimes you might encounter signs that warrant a visit to a mechanic:
- Unusual Oil Color: As mentioned, if the oil appears milky or if you spot metal particles, it’s a sign of potential issues.
- Persistent Low Levels: If you find yourself frequently needing to top up oil, there might be a leak or another underlying issue.
- Engine Noises: If you hear knocking or rumbling sounds from the engine, it’s best to consult a professional.
Pro Tip: Regular maintenance checks by professionals can preemptively catch and address i
FAQ
How often should I check the engine oil using a dipstick?
While the article recommends checking at every other gas fill-up, the frequency can also depend on your vehicle’s age, make, and model. For older cars or those with known issues, checking more frequently, perhaps weekly, is advisable. For newer models, once a month might suffice. Always refer to your vehicle’s owner manual for specific guidance.
Can I use any cloth or rag to wipe the dipstick?
Ideally, you should use a clean, lint-free rag or paper towel. This ensures that no debris contaminates the oil or gives a false reading. Using a dirty or linty cloth might leave residues on the dipstick, affecting the accuracy of your reading.
Why do some cars not have a traditional dipstick?
With advancements in technology, some modern vehicles come equipped with electronic oil monitors that provide digital readings. These systems aim to offer more accurate and consistent measurements, eliminating the need for manual checks with a traditional dipstick.
Is there a difference between dipsticks for diesel and gasoline engines?
Yes, there can be differences. While the primary function remains the same, the calibration or markings might vary based on the oil’s viscosity recommended for diesel versus gasoline engines. Always ensure you’re using the correct dipstick for your engine type.
Conclusion
And there we have it! From understanding the basics of a dipstick to knowing when to seek expert advice, we’ve covered it all. Remember, the dipstick is more than just a tool; it’s a window into the health of your engine.
Regular checks can ensure your vehicle’s longevity and optimal performance. So, the next time you’re at a gas station or prepping for a long drive, take a moment to check that dipstick. Your car will thank you for it!
Drive safe and keep that engine purring!